I know I can’t be the only person who has 2 or 3 dozen beautiful hardcover cookbooks that I love looking through and then forget about. How many do you have? I’m currently obsessed with collecting all the ‘Night’ cookbooks from Williams Sonoma… Taco Night, Burger Night, Chicken Night, etc. They’re so pretty and the recipes are SO good! I find a lot of great ideas on Pinterest, but just like reading a real paper book, there’s something about cooking out of an actual cookbook that just makes me happy. 🙂
I’ve implemented testing Tuesday since getting married and have been pulling out my old cookbooks to find new things to try and came across a picture of these GORGEOUS potato loaves in my Baking with Julia (thank you, Katie) book. I figured they’d be super complicated and require all kinds of things I don’t keep in the house, but I was wrong… and oh man, this bread is SO good. You’ve gotta try it!
FYI, it makes 2 good sized loaves, freezes really well, and would work great for sandwiches.
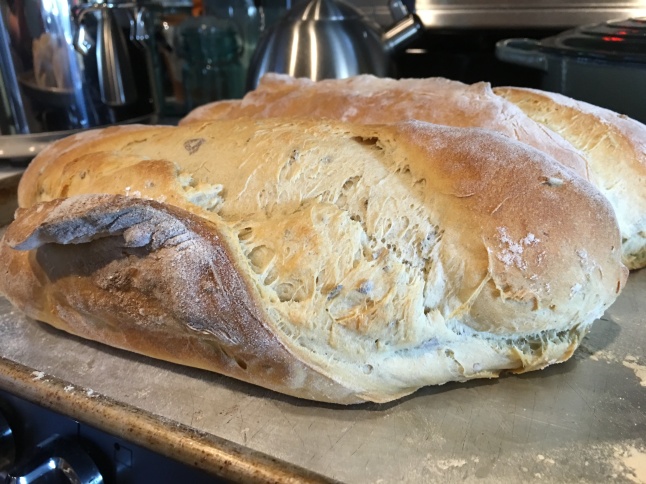
RUSTIC POTATO LOAVES
- 1 1/2 lbs. russet potatoes
- 4 tsp. salt
- 1/2 c. tepid reserved potato water
- 1 T. yeast
- 2 T. olive oil
- 4 3/4 c. all-purpose flour
- Spray bottle of water
Wash and quarter potatoes, leaving skins on. Put in a pan, cover with water, add 2 tsp. salt and boil until tender.
IMPORTANT: drain potatoes over a large measuring cup and keep the potato water. As it settles all the yummy, starchy goodness from the potatoes will go to the bottom of the bowl and THAT is the 1/2 c. potato water that you want to use for proofing your yeast… but we’ll get to that in a second.
Drain potatoes well and then let them sit for about 30 minutes – they need to be dry before moving on to mixing the dough.
Once potatoes are dried and cool, pour most of the potato water out but keep the bottom 1/2 c. (Instead of giving the yeast sugar to snack on, we’re going to let it feast on that starchy goodness from the potatoes.) If the potato water is not warm to the touch put it into the microwave for a few seconds so that it’s warm enough to proof the yeast. Stir in yeast and set aside to proof.
Place potatoes in mixing bowl and mash using the paddle attachment. Add proofed yeast, and olive oil and continue mixing until well combined. Switch paddle to dough hook and add flour and the other 2 tsp. of salt. Mix on low for 2-3 minutes and then on medium for 11. I know it seems crazy, but set the timer and walk away. 11 minutes is EXACTLY what it takes to get the dough right.
Cover mixing bowl with plastic wrap and let rise for 30 minutes.
After first rise, preheat oven to 375 and then turn dough out onto floured surface and cut in half. Shape each half into a ball and then flatten into a 6-8″ circle. Sprinkle the edge of the dough closest to you with a little flour and then, starting at the opposite edge from what you just floured, roll the dough toward you. Now, you need to get that into a football shape about 12″ long. Gently roll that dough back and forth beneath your hands, paying special attention to the ends so that they’re “slimmer” than the middle. (You might need to pinch them down a little.) Repeat process for 2nd loaf and then place seam side down for 2nd rise.
After 20 minutes, spray the inside of the oven with your spray bottle of water and then quickly close the oven door to trap the steam. Transfer loaves, seam side up, onto floured sheet pan. Place loaves in center of oven and then spray the sides of the oven again, quickly closing the door. Bake for 45 minutes or until loaves are hollow-sounding when thumped.
I don’t know about you, but the smell of my house when there’s bread baking in the oven is the BEST. Makes your house feel like a home.
Give this a go and let me know what you think!